Wednesday, February 27, 2013

Beyond Plaid


I normally have a lot of trouble creating male cards but this is the second week this term we have made cards for the men in our lives.  The new Beyond Plaid and Dapper Dad stamp sets from the current Mini are great for mens projects but we did do one girly card using the Beyond Plaid just to show that it is versatile.

 
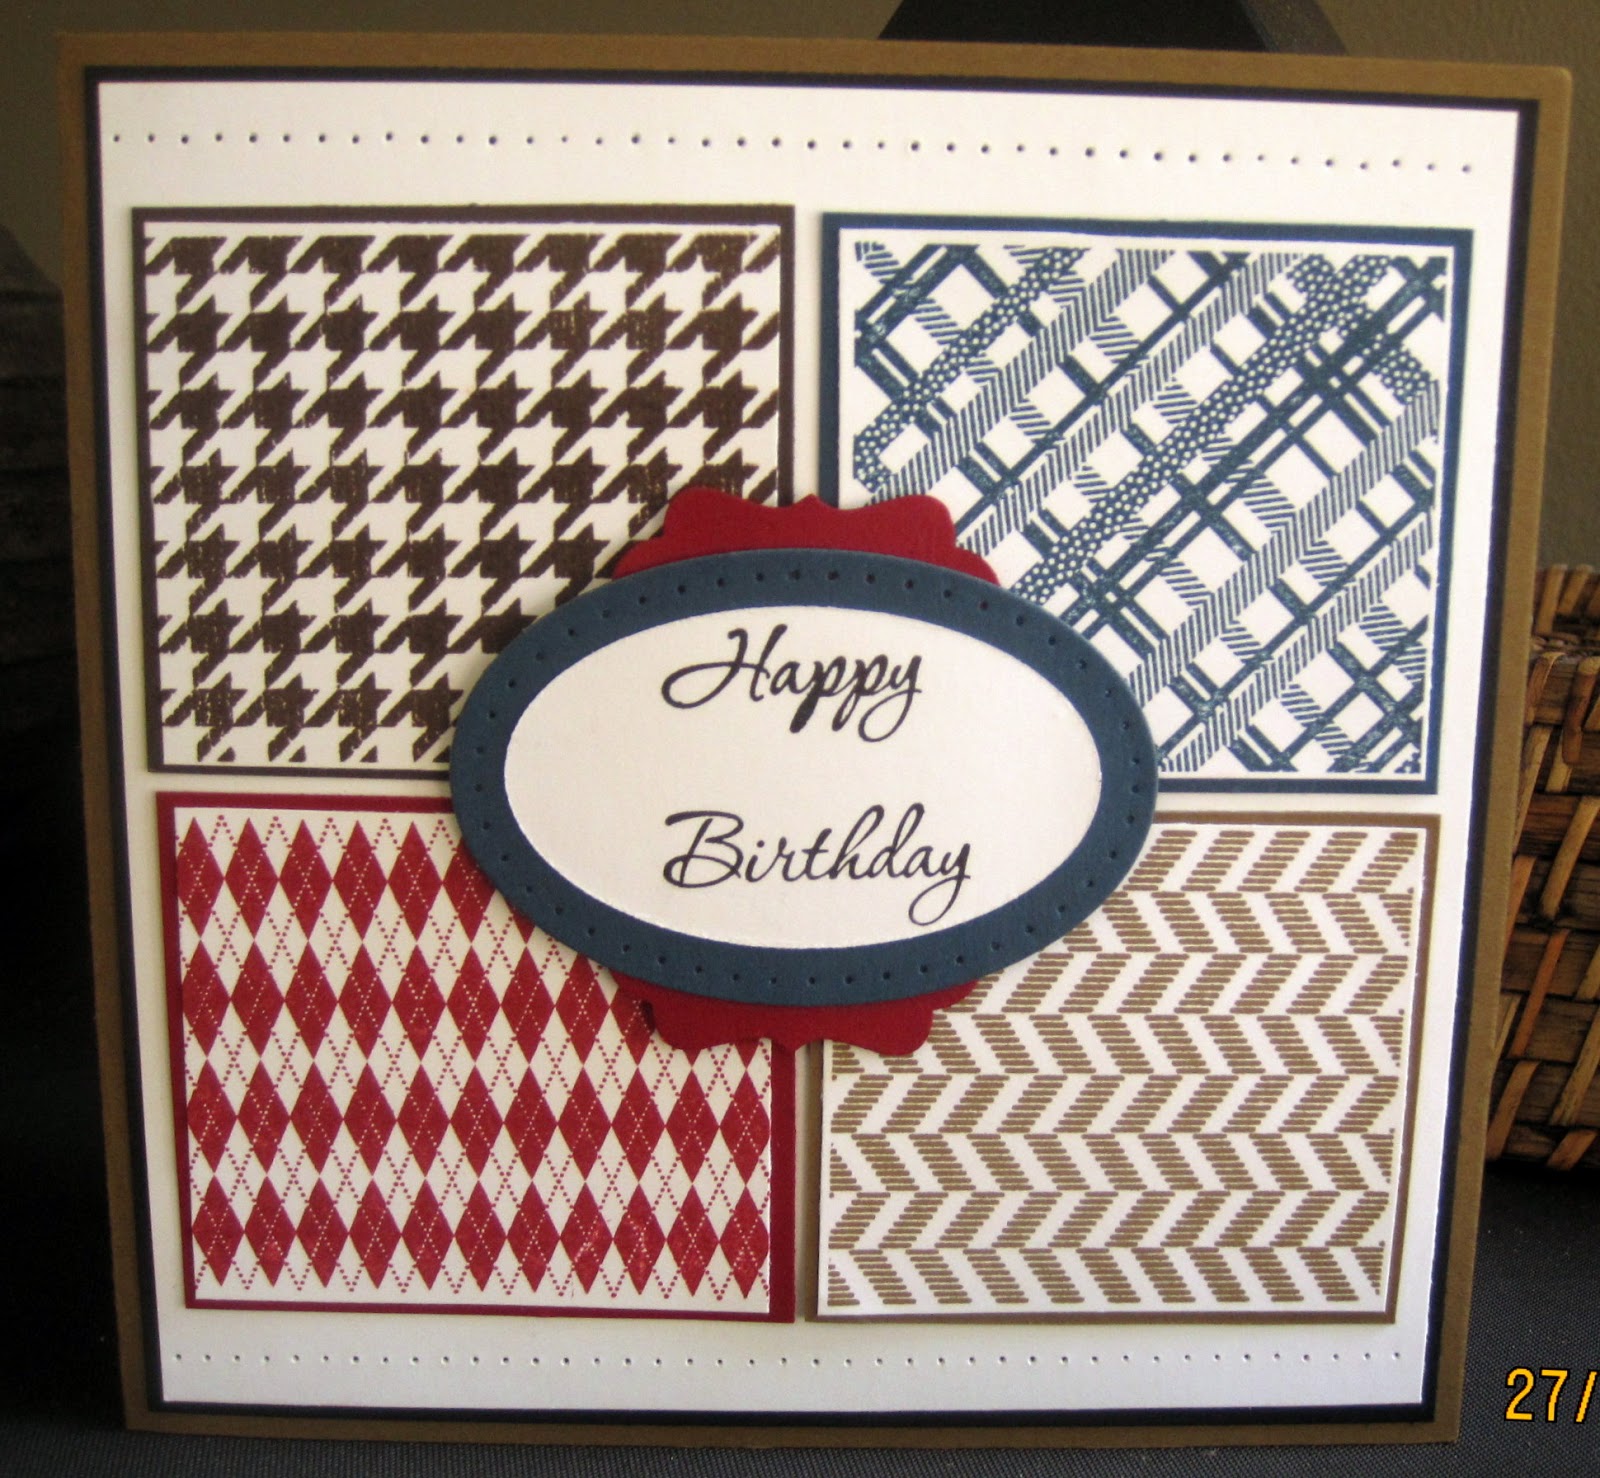
This first card was created using Beyond Plaid in various colours. We used Early Espresso, Not Quite Navy, Cherry Cobbler and Soft Suede.  The words are from Memorable Moments cut out with the Ovals Framelits Dies and mounted on a Decorative Label Punch shape.  I had a bit of a facination with the Paper Piercing tool this week and each card has some paper piercing in it.  I think I might have over done it a little for one week!

 
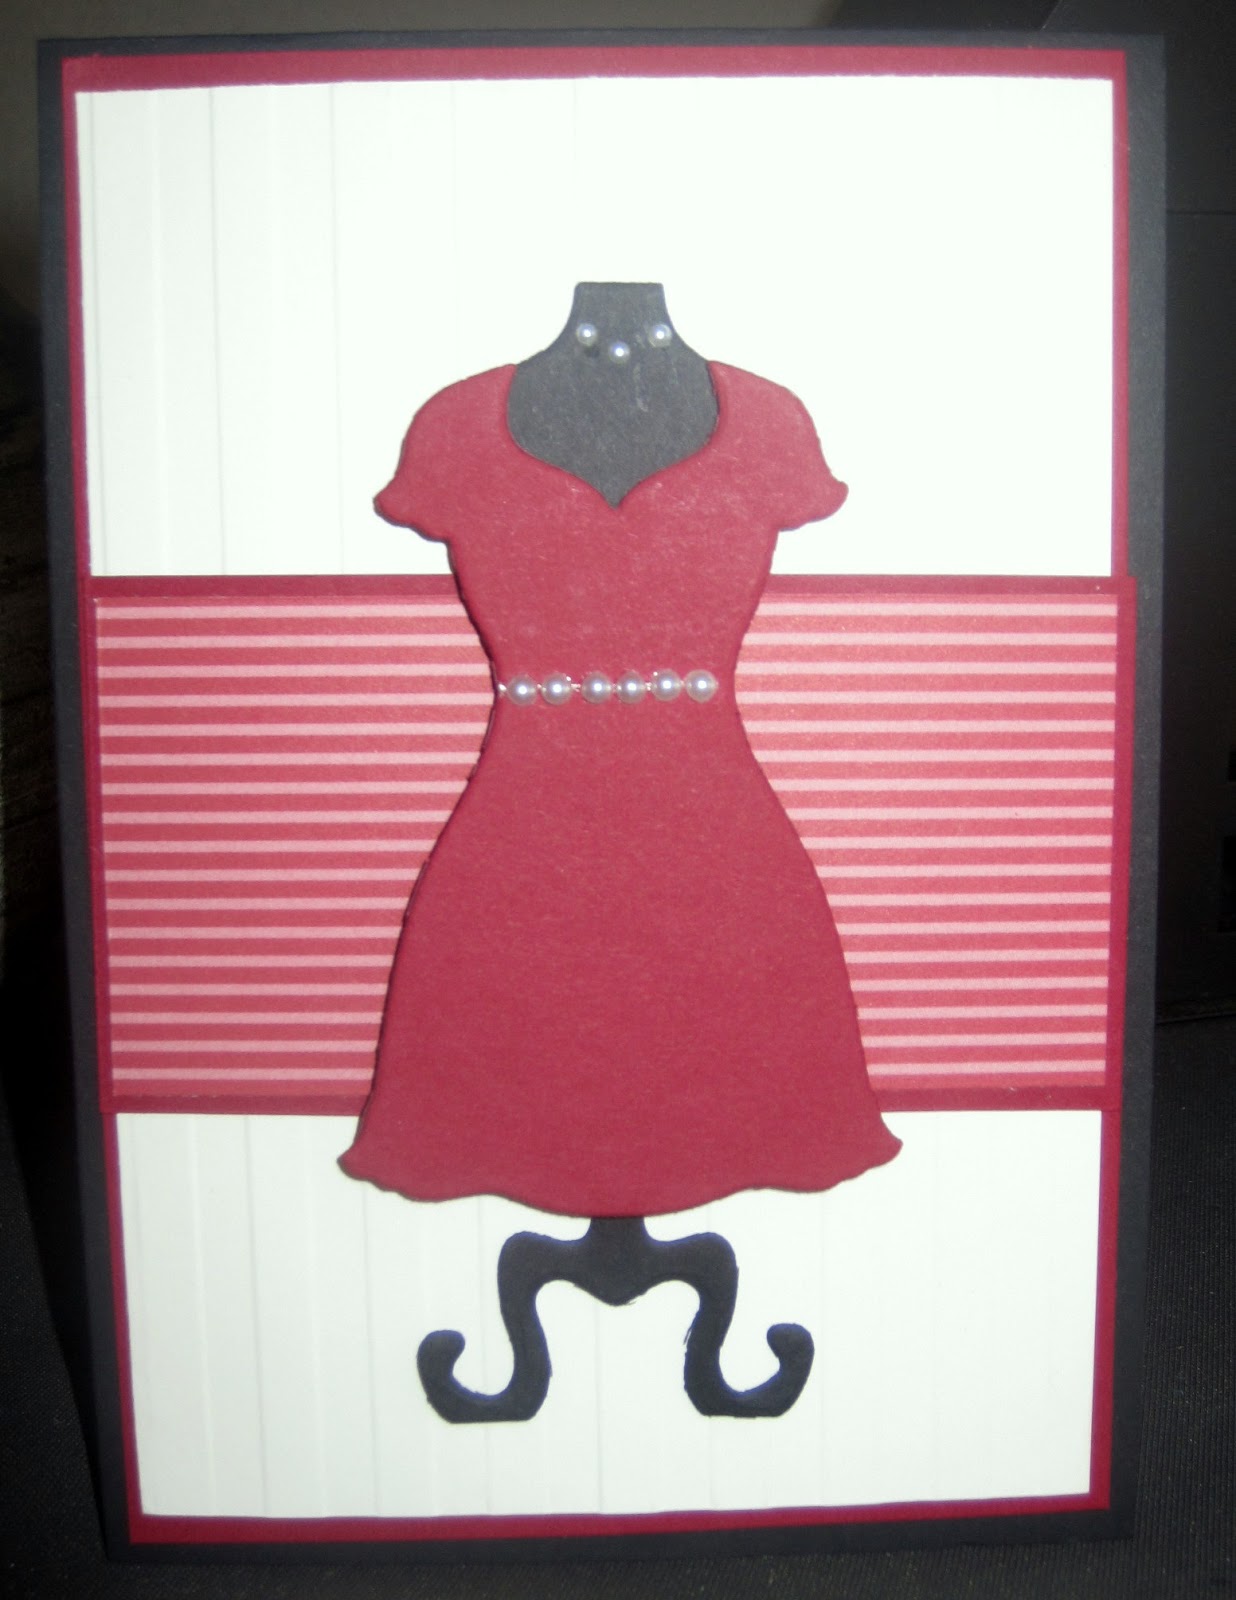
I wanted to show that you can use the Beyond Plaid set for both Male and Female cards.  I did see a card similar to this when I was trawling the internet one night but I didn't save a reference to it so for whoever sparked off this creation, thanks for the inspiration.  If I come across the site again, I will come back and make and acknowlegement.  The card is done in Rose Red and Whisper White.  The hearts are from the Hearts a Flutter and Hearts Collection Dies and the words are from Teeny Tiny Sentiments.  A gemstone just adds to the girly bling look.

 
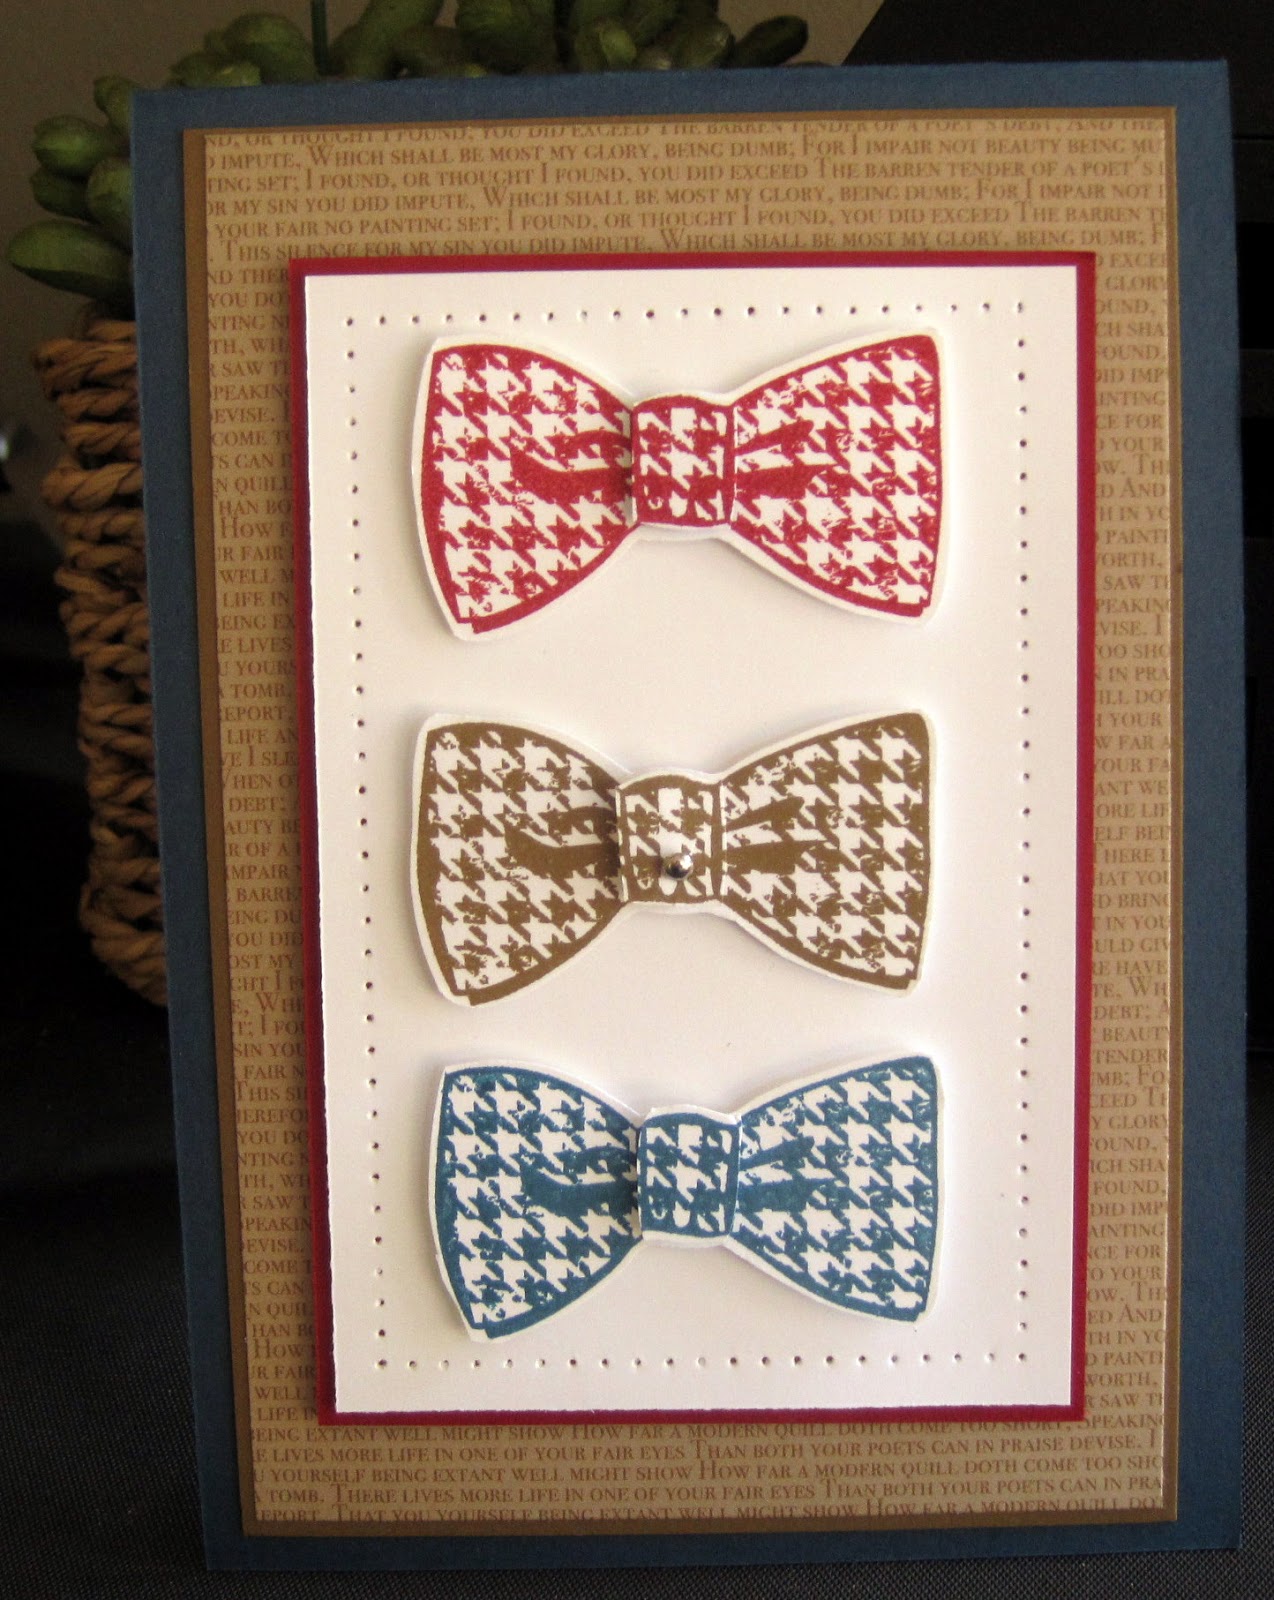
Teh bow tie is my favourite stamp from the Dapper Dad set but I am looking forward to using the shoe and watch to see what I can do with them.  We stuck with the same colour scheme of Cherry Cobbler, Soft Suede, Not Quite Navy and Whisper White.  The printed paper is from the Neutrals DSP pack and a little paper piercing to finish it off.  It is very difficult to see in the photo but the middle tie has a little silver brad in the knot as a tie pin.
 
Not sure what I have in mind for next weeks class but it might be time to go girly!
 

Saturday, February 23, 2013

Secret Garden & Summer Silhouettes

The new mini has lots of goodies that I just had to have in it.  One of the great new "bundles" was the Secret Garden bundle.  Not only do you get a stamp set but you also get the dies to match at a discounted price!  I just love all the new dies.  If you can't have a punch for every shape, the next best thing is a die to do the cutting for you - there should be more!!!

 
All the cards this week were done in Shimmer White cardstock.  This one used some Pool Party DSP.  We stamped the flowers with Pool Party.  We cut out a flower from the front panel of the card and then stuck it to the inside of the card giving a window effect.  The other two flowers were raised up with dimensionals and pearls added to all the flower centres.  Simple card but better in real life.


This was our second card done with the same Secret Garden flower.  Firstly, we stamped the flower onto the card in Pink Pirouette.  We then stamped them onto watercolour paper in Rasberry Ripple and watercoloured them.  The little flowers are from the Flower Trim ribbon on page 5 of the Mini and the words are from Bloomin With Kindness.

 
This card used the Summer Silhouettes set.  The words are from Teeny Tiny Sentiments.  The colours are Melon Mambo and Lucky Limeade. 
 
All three cards were very quick and simple to make but looked like a bit of effort had been put into them.

Wednesday, February 20, 2013

Dressed For Valentines


One of the things from the new Mini that I had to have was the All Dressed Up Bundle.  It comes with a stamp set and Framelit Dies to compliment.  We only used the dies for this card and I can't wait to experiment with different styles.  The colour combo for this card is basic black, cherry cobbler and very vanilla.  The paper is from one of the DSP Stacks, with some basic pearls to dress it up.  We used the Stripes Embossing Folder on the vanilla layer but sadly it doesn't show up in the photo very clearly.
 
 
As it was getting very near to Valentines Day we had to be prepared.  Not everyone has a Valentine or wanted to do anything specific so I tried to keep our projects a little neutral so they could be used for other events.
 
This little gift box was made from the purse die.  You cut 4 of them and with a few little alterations, stick them together and this is what you are left with.  Cute!  We used the Hearts A Flutter Dies, a bit of DSP, a tag and a little bling and it could be used for anyone!


The new Mini has 3 new colours in the Core'dinations Card Stock.  We used the Pool Party for this card with Island Indigo and Very Vanilla.  The Honeycombe Embossing folder is also from the new mini and is just so striking.  The words are from the Vintage Verses Sale-a-bration set done on a tag from the Apothecary Accents Framelits.  The little hearts are from the Owl punch and the DSP is from the In Colour DSP Pack.

A Little Treat Jar


Every year a group of friends go away for a wonderful weekend at Somersby.  A very good friend of ours parents have a small property there and it is always such a lovely getaway.  We have been going there for about 12 years now and we always come home so relaxed and not wanting to eat for a few days as there is always far too much food.
I like to give a gift of something handmade each year as a small token of our appreciation for such a fantastic weekend.  This year, I did a jar that I got at Woollies and filled it with Choccies.  I covered it with a strip of Rose Red cardstock that was embossed with the Elegant Lines Embossing Folder.  The ribbon is the two tone, Pink Pirouette/Rose Red from the new mini. The tag is done with a combination of punches and Big Shot dies and the little flower is the gorgeous Flower Trim ribbon from the new mini.
I created the "Gerbera" oon the lid using a die that sadly didn't come to Australia but I was lucky  enough to be given one.  There are many layers to create the look but you could do something similar with any of the flower big shot dies.  Under the flower is the Scallop Circle Bigz Die and a button from the brights collection.
This really turned out to be more of a pressy for the lady of the house as it is quite girly but I was really pleased with how it turned out and she absolutely loved it!

Monday, February 18, 2013

Unwanted Comments

Sadly, lately I have been receiving many unwanted comments that are clearly spam.  I have had to change my settings so that I can now moderate each comment.  Do these people really think that we would be silly enough to click on sites that refer to hemaroids or pieces of the male anatomy????

I now have to investigate how I can block these people somehow or look at changing my blog as I don't want to risk anyone accidently having access to these peoples links and getting viruses on their computers.

If you have any experience in this, I would love to hear from you and how you managed to stop it.

FRUSTRATING!!!!!!

Friday, February 8, 2013

Feeling Sentimental - SAB


I did say that I was going to start the year off doing the right thing and keeping my blog up to date, so at least week 1, I will live up to that dream.  Classes returned on Tuesday and it was great to catch up with everyone again.  There was lots of chatting so it was a little difficult to get the classes going but we managed to get everything done and catch up on everyones holidays.  That's the beauty of being a woman, we can talk and work at the same time!!!!!  Sorry to any males who check in.....
 
Stampin' Up! run a fantastic promotion at the beginning of the year called Sale-a-braton (SAB) and it means that you can earn extra FREE stuff - too cool.  For every $100 you spend you can choose a FREE product from the SAB brochure and this year there are 19 great products to choose from.  If you haven't seen a copy of the brochure, let me know and I will make sure you get a copy.
 
This is my favourite set from this years promotion, called Feeling Sentimental.  It is awesome for male cards and if you have any Dr Who fanatics that you know, this is the set for you!
 
This first card used Night of Navy, Real Red and Very Vanilla cardstock.  Night of Navy and Real Red ink, Itty Bitty Banners, Houndstooth EF, 3" and 31/2" circle Bigshot dies, 1" and 3/4" circle punches and the Basic Designer Button is from the new Mini Catalogue that you must see also.  We also double stamped and mounted the actual "wheel" part of the image to make it pop.


The second card, which really didn't want to photograph any better than this used the Penny Farthing stamp.  We used Basic Black, Real Red, Very Vanilla cardstock and some of the First Edition DSP.  The ribbon is Basic Black 1/8" taffeta ribbon.  It is simple but effective.  You can't see it but we double stamped and mounted the large wheel and handle bars with dimensionals to give the card some dimension.


This card also used the Night of Navy, Real Red and Whisper White cardstock.  The Real Red is the new Core'dinations cardstock so that when we embossed it with the awesome new Honeycomb Embossing folder we could sand it and give it a rustic look.  I am just loving the new core'dinations range and we have 3 new colours in the new Making A Difference Mini Catalogue.

We used the Telephone box image or Tardus if you are a Dr Who fan.  We double stamped this also and cut out the windows from the second image and then mounted it over the original image.  We then painted over the windows with Crystal Effects to make it appear like they were glass windows.  Sorry this was too difficult to capture in the photo.

Hopefully, I will be this organised again next week and get my photo's up quickly.  If you want to know any more about any of these cards, please contact me.  If you want to come along and make your own creations, book inot any of my classes, I would love to meet you.
 

Friday, February 1, 2013

It has been far too long between posts

I have been so very bad but did not realise just how bad!  I can't belive the date of my last post was in September LAST YEAR!!!!!

I don't have a really good reason for not posting other than life just took over in the last term of 2012 and day after day my poor old blog site just got ignored.  I had such good intentions - I actually have a box full of the cards we made through out the term but just never got to take photo's. 

I promise to lift my game and get back to regular postings and I may - no promises - post some of last years projects.

My classes begin on Tuesday so stay tuned.  There are also some great promotions going so I will have to get those posted also.    I have  booked dates for my second Stamp Camp so will put up details on that so you can book it into your diaries.  Maybe with this awful weather that seems to have set in for the weekend I will be able to get a head start.

I apologise to those of you who have kept checking in for an update and I promise to be a better blogger this year.

Thanks for checking in.